
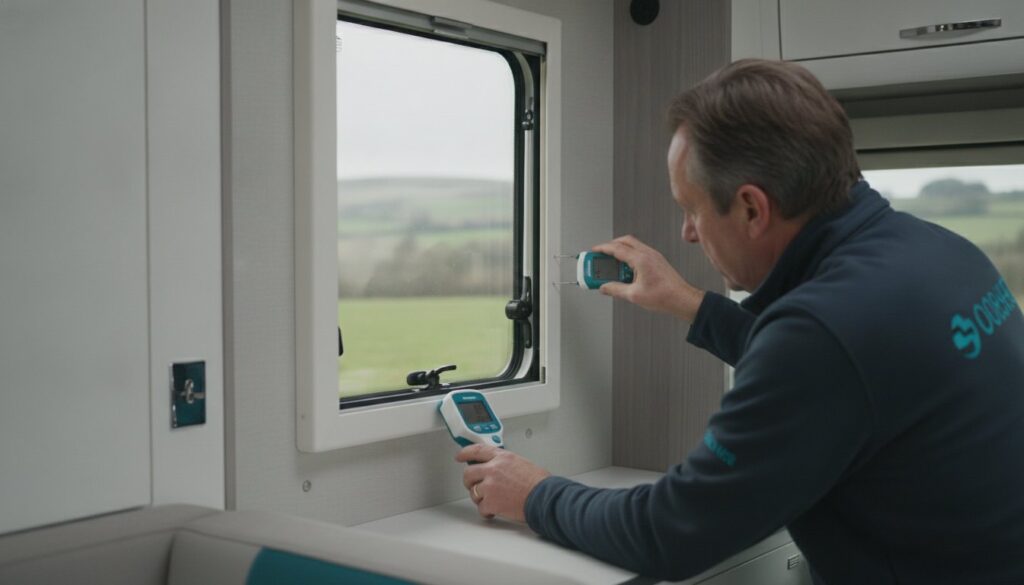
A single failed seal can quietly compromise your motorhome’s structural integrity long before you ever see a drip. It’s a common fear amongst owners, especially when the dread of a failed habitation check or a damp-ridden purchase looms over every trip. You likely want to feel in control of your vehicle’s condition rather than waiting for an annual report to deliver bad news. Understanding how to check for damp in a motorhome yourself is the most effective way to protect your investment and catch water ingress at the earliest possible stage.
This guide provides a clear, step-by-step framework to help you achieve a professional-standard pass or fail assessment of your leisure vehicle. You’ll learn which moisture meters actually work on modern panels, exactly where leaks typically start, and the sensory signs that indicate active damp. We’ll show you how to interpret readings with confidence and identify the precise tools needed for a thorough DIY inspection. By following these methods, you’ll gain the peace of mind that comes from knowing your motorhome is dry, safe, and ready for the road.
Key Takeaways
- Understand why the UK climate makes regular monitoring essential to prevent minor leaks from becoming expensive structural failures.
- Master the use of specific tools, such as pin-type moisture meters and high-powered torches, to find hidden water ingress in dark lockers.
- Follow a systematic inspection walkthrough to learn how to check for damp in a motorhome yourself by focusing on high-risk areas like rooflights and window seals.
- Decode moisture meter readings using industry-standard thresholds to distinguish between normal ambient humidity and active damp.
- Recognise the warning signs that indicate a DIY check has reached its limit and requires a professional damp inspection and report.
Why Regular DIY Damp Monitoring is Vital for UK Motorhome Owners
Damp is the single greatest threat to a motorhome’s longevity. In the context of leisure vehicles, damp refers to water ingress that bypasses external seals and saturates the internal timber and wallboards. The UK’s unpredictable climate, characterised by high humidity and driving rain, creates a challenging environment for external sealants. Whilst surface condensation is common during winter use, structural water ingress is a far more serious issue. Learning how to check for damp in a motorhome yourself allows you to act as the first line of defence. These checks are designed to bridge the gap between your annual professional habitation checks, ensuring that a leak developed in autumn doesn’t rot your van until the following summer.
The UK climate is particularly unforgiving. Constant cycles of freezing and thawing, combined with horizontal rain, put immense pressure on the joints where the roof meets the side panels. Surface condensation is often just a byproduct of breathing and cooking inside a cold van. However, structural ingress is an external failure. DIY monitoring helps you spot the difference before the “mushy” wallboard stage. It’s about being proactive rather than reactive.
The Financial Impact of Undetected Damp
Damp is a silent devaluer. A motorhome with significant water ingress can lose thousands of pounds in resale value overnight. This happens because of the “sponge effect.” Timber frames hidden behind decorative wallboards absorb moisture, rotting from the inside out without showing immediate surface signs. By catching a failing seal early, you can often resolve the issue with a simple resealing job. This reduces potential repair costs from four-figure structural rebuilds to two-figure maintenance tasks. Early detection is the difference between a minor inconvenience and a financial disaster.
DIY vs Professional Damp Inspections
It’s vital to understand that a DIY check is a monitoring exercise, not a substitute for a certified report. A professional damp inspection and report from LeisureVan Service Solutions is usually a non-negotiable requirement for insurance claims, warranty validation, and private resale. Professional technicians use a high-grade moisture meter that’s regularly calibrated to a much higher standard than the budget devices available to the public. Whilst knowing how to check for damp in a motorhome yourself gives you confidence in your vehicle’s health, only a professional survey provides the documented evidence needed to secure your investment for the long term.
The Kit List: Choosing the Right Tools and Using Your Senses
Whilst professional technicians use high-end diagnostic equipment, gathering a few specific tools allows you to monitor your vehicle effectively between services. A powerful LED torch is your first asset. It reveals “tide marks” and staining in the dark corners of bed boxes and overhead lockers that a standard phone light might miss. You should also keep a dedicated notebook or a printed floorplan of your van. Recording readings at specific points every few months helps you track changes and distinguish between seasonal humidity and a developing leak. This level of detail is a key part of preventing moisture from causing long-term structural damage.
The most critical tool is the moisture meter. Pin-type meters are invasive, requiring you to push two sharp probes into the wallboard to complete an electrical circuit. Whilst accurate for timber, they leave visible holes. Pinless meters use radio frequency to scan below the surface without damage. If you’re learning how to check for damp in a motorhome yourself, having both, or at least a high-quality pinless model, is ideal for a thorough inspection.
Selecting a Reliable Moisture Meter
When shopping for a meter, look for a mid-range device with a clear 0-40% scale. Many budget “damp meters” found in DIY stores are actually designed for measuring the moisture content of firewood; these often lack the sensitivity required for motorhome wallboards. Pinless meters are preferred for modern composite wallboards to avoid leaving unsightly puncture marks in the decorative finish. A calibrated device ensures you aren’t chasing “ghost” readings caused by internal metal framing or foil-backed insulation.
The Sensory Check: Smell, Sight, and Touch
Your nose is often more sensitive than any budget electronic device. A distinctive, earthy, or “mushroom-like” scent when opening a cupboard after storage is a classic red flag for stagnant water ingress. Visually, look for “pimple” patterns on the wallboard. These small bumps occur when the internal ply begins to delaminate due to moisture. Finally, use your hands to feel for tactile signs of trouble. A healthy wallboard should feel firm and cold. If a section feels “spongy” or if the wallpaper has lost its adhesive bond and feels “bubbly,” you likely have an active ingress issue.
If your sensory checks reveal something concerning, you can book a professional diagnostic session to pinpoint the exact source of the leak before it spreads.
The Inspection Walkthrough: Where to Check for Water Ingress
A systematic approach is the only way to ensure you haven’t missed a hidden leak. When learning how to check for damp in a motorhome yourself, always follow the path of gravity. Water ingress typically starts at the highest points of the vehicle and migrates downwards through the wall structure, often pooling at floor level or behind furniture. This means a soft spot near the wheel arch could actually be caused by a failing seal on the roof. By moving methodically from the ceiling to the chassis, you can trace the path of moisture and identify the source rather than just the symptom.
The Roofline and High-Level Seals
The most vulnerable areas are the points where the coachwork has been breached to install accessories. Start your inspection by examining the ceiling join where the roof panel meets the side walls; this is a primary stress point during travel. Pay close attention to rooflights and skylights, as the plastic frames can develop hairline cracks over time. If you have had solar panel installations or satellite dishes fitted, check the cable entry glands and mounting brackets. These seals are exposed to the harshest UV light and extreme temperature changes, which can cause sealant to shrink and pull away from the bodywork.
Lower Level and Hidden Voids
Once you have cleared the high-level checks, move your focus to the mid-section and floor. Inspect the internal perimeter of every window and door. Seals often fail where the frame meets the outer skin, allowing water to seep into the wallboard. In the lower half of the van, damp often “pools” in areas with restricted airflow. This includes under-seat storage lockers, the back corners of bed boxes, and the voids behind kitchen units. Check the very back corners of upper cabinets as well, as moisture can often hide behind the decorative trim where the wall meets the ceiling.
Don’t forget service points. Check the area around the battery box, external water inlets, and the gas locker. These apertures are frequent entry points for road spray whilst driving. Finally, inspect the floor-to-wall joint throughout the vehicle. If you find high readings behind the fridge or under the sink, it may indicate a plumbing leak rather than external ingress. Documenting these specific locations in your notebook helps you build a clear picture of your motorhome’s health and provides a logical starting point for any necessary repairs.
Analysing the Results: Moisture Percentages and Danger Zones
Once you have completed your walkthrough, you will be left with a series of numbers on your moisture meter. Interpreting these correctly is the most important part of how to check for damp in a motorhome yourself. A single high reading does not always mean your vehicle is rotting; however, it does demand a methodical investigation. You must distinguish between ambient moisture, surface condensation, and active water ingress to avoid unnecessary anxiety or, conversely, missing a serious structural problem.
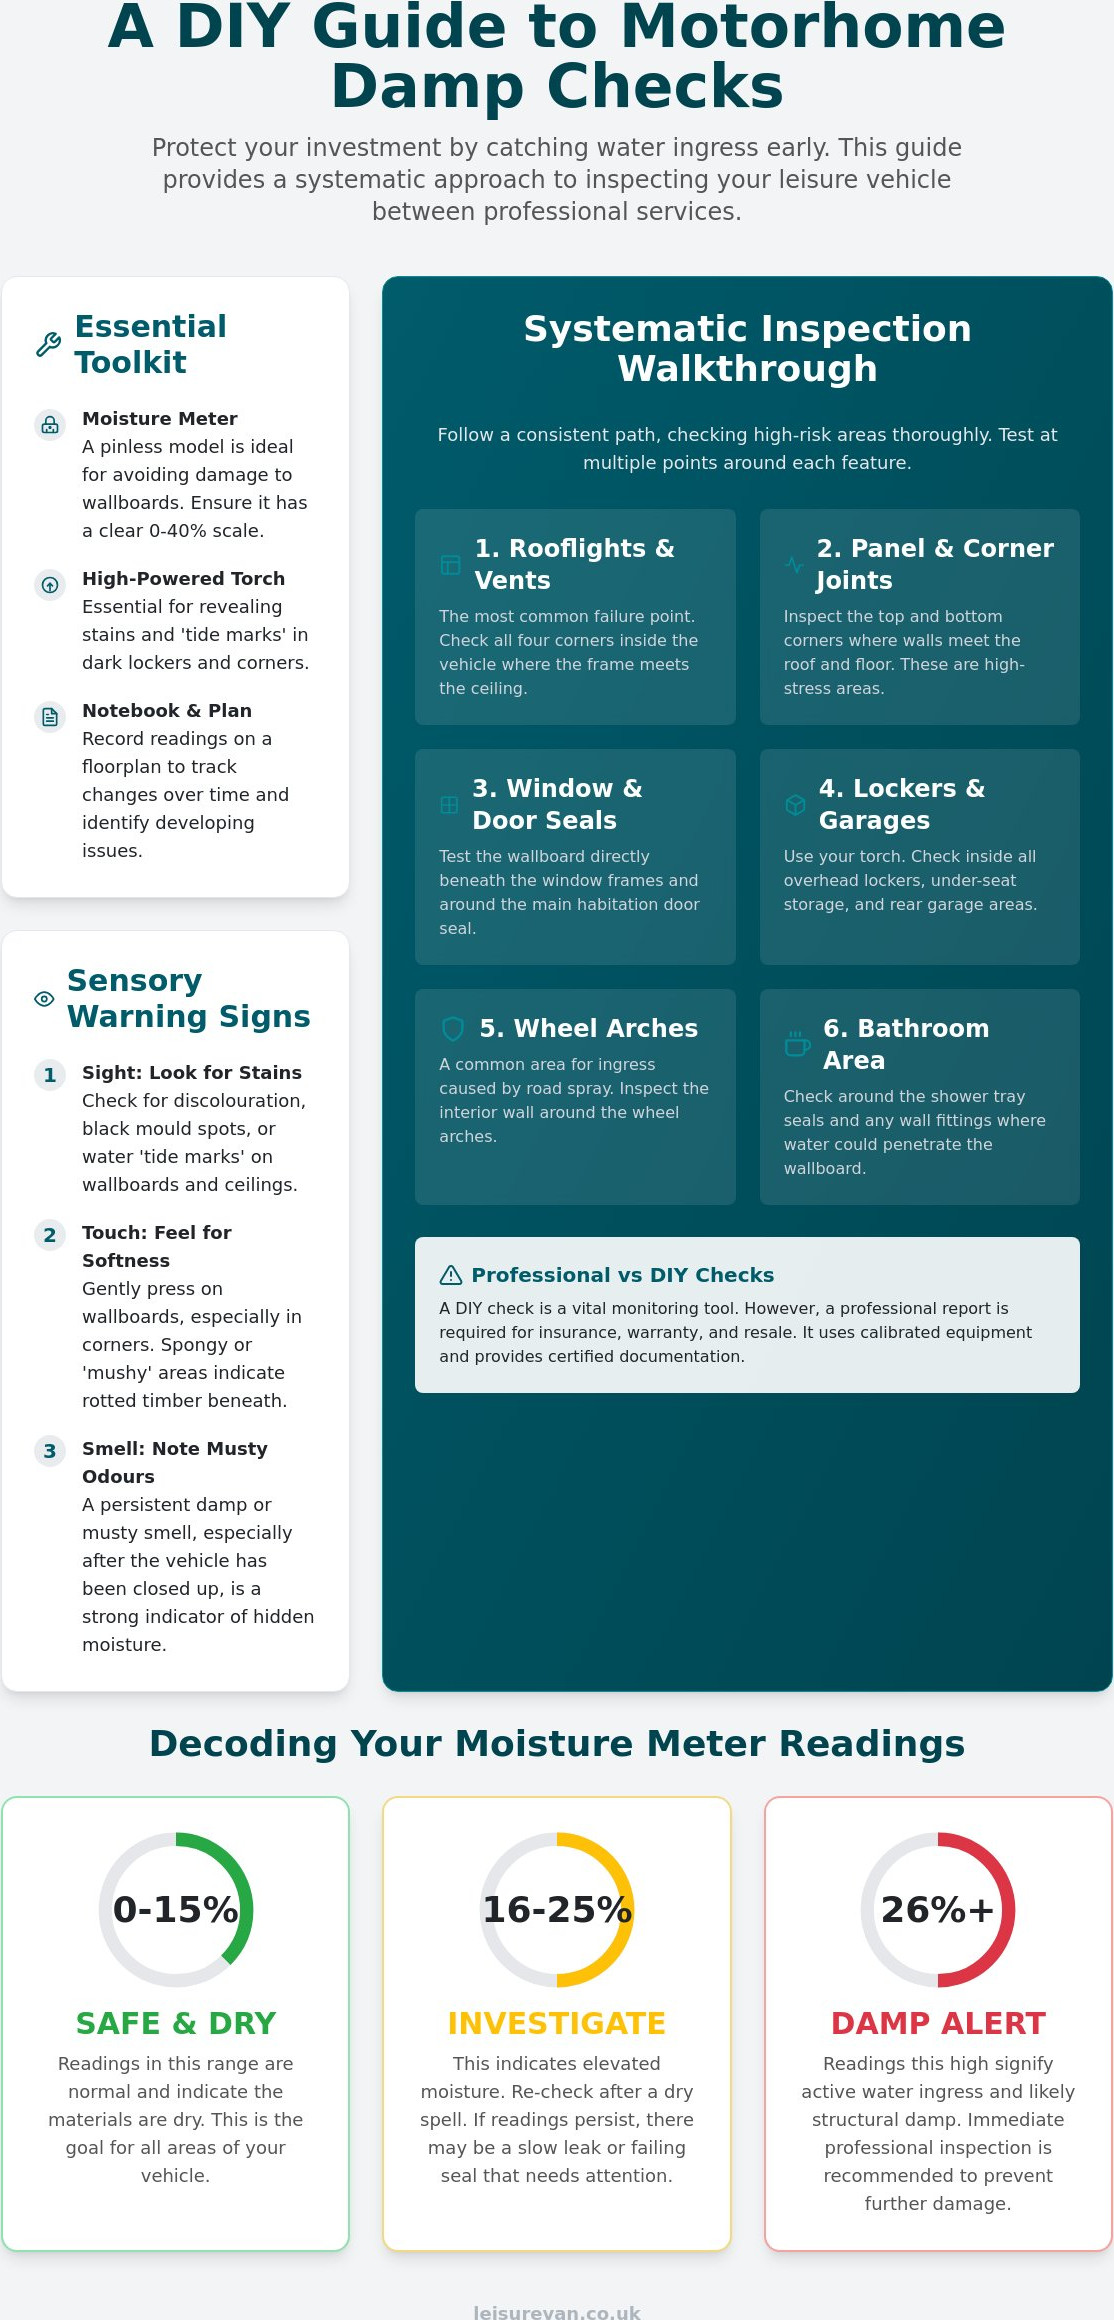
- 0% – 15% (Normal/Dry): These are healthy readings for a UK motorhome. Even a perfectly dry vehicle will show some moisture due to the natural humidity in our air. No action is required here.
- 15% – 20% (The Warning Zone): This range suggests either heavy surface condensation or the very early stages of water ingress. You should monitor these areas closely and re-test them in three months to see if the levels are rising.
- 20% – 30% (Active Damp): These readings indicate that water is successfully entering the structure. Remedial work is required to identify and seal the source of the leak before the internal timber begins to degrade.
- Above 30% (Structural Risk): This is a critical level. At this stage, the internal structure is likely saturated. Timber rot and structural degradation are high risks, and immediate professional intervention is usually necessary to save the vehicle.
Understanding False Positives
High readings aren’t always caused by leaks. Metal framing, internal wiring, or foil-backed insulation hidden behind the wallboards can trigger a “false positive” on many moisture meters. High humidity during a rainy day can also temporarily inflate surface readings. To confirm a genuine “hot spot,” always take multiple readings approximately 10cm apart. If the high numbers are concentrated around a seal or a window frame, it is far more likely to be an ingress issue than a piece of internal metalwork.
Recording Your Findings
Consistency is your best ally. We recommend creating a simple damp map of your vehicle by drawing a basic floorplan in your notebook. Mark the exact spots where you take readings and record the percentages alongside the date. Comparing today’s data with readings from six months ago provides a much clearer picture of your vehicle’s health than any single measurement. You can find more long-term maintenance tips in our guide to preventing damp in a motorhome, which covers ventilation and storage strategies.
If you find consistent readings above 20% and aren’t sure of the source, you can request a professional fault diagnosis to stop the damage before it spreads further.
Securing Your Investment with a Professional Damp Report
Whilst knowing how to check for damp in a motorhome yourself is a vital skill, there comes a point where DIY monitoring must transition into professional action. If your moisture meter consistently returns readings over 25%, or if you discover soft wallboards and visible mould, the situation requires a specialist. A damp inspection and report from LeisureVan Service Solutions provides South Yorkshire owners with the technical certainty that budget tools cannot offer. We identify the precise point of ingress and provide a roadmap for repair before the damage compromises the vehicle’s safety.
A professional report is an essential document for anyone looking to sell or part-exchange their vehicle. Buyers in 2026 are increasingly savvy about water ingress; they want more than just verbal reassurance. A documented history of professional inspections proves you’ve maintained the vehicle to a high standard. These checks are also a fundamental component of a full motorhome habitation service. By combining gas, electrical, and water system tests with a thorough damp survey, you ensure every aspect of your living area is roadworthy and secure.
What Happens During a Professional Inspection?
During a professional survey, we use industry-standard, calibrated equipment that penetrates deeper than most consumer-grade meters. This allows us to find moisture hidden behind furniture or inside floor sandwiches that a standard DIY check might miss. We provide a detailed written report that forms a permanent part of your service history. For your convenience, our mobile engineers travel to your home or storage site; this removes the hassle of driving to a workshop and waiting for hours. It’s a thorough, transparent process designed to give you total peace of mind.
Next Steps: Booking Your 2026 Service
Regular professional checks are often a mandatory requirement for maintaining your manufacturer’s water ingress warranty. Missing just one annual service can void your protection, leaving you responsible for expensive structural repairs. If your own DIY checks have revealed worrying results, or if your annual service is due, you can request a service booking today. Taking action now prevents a small leak from becoming a major structural failure. LeisureVan Service Solutions provides the dependable, expert care your motorhome deserves across the South Yorkshire region.
Protecting Your Motorhome for Future Adventures
Systematic monitoring and the right tools are your best defence against water ingress. By mastering how to check for damp in a motorhome yourself, you can catch early warning signs before they escalate into structural failures. Combining moisture meter readings with the sensory cues we’ve discussed ensures your motorhome stays in peak condition whilst bridging the gap between professional inspections.
If your readings are concerning or you simply want the certainty of a certified survey, our qualified mobile service engineer is ready to assist. We provide detailed pre-purchase and damp reports to secure your investment and maintain its resale value. Serving Sheffield, Rotherham, and the wider South Yorkshire area, we bring technical expertise directly to your home or storage site. This proactive approach keeps your travels worry-free and your vehicle safe for years to come.
Book a Professional Damp Inspection with LeisureVan Service Solutions Today and enjoy total peace of mind on the road.
Frequently Asked Questions
Can I use a cheap wood moisture meter for my motorhome?
You can use a basic wood meter, but it often lacks the precision needed for leisure vehicle substrates. These devices are calibrated for the density of timber rather than the thin wallboards or composite panels used in modern coachwork. Whilst they can provide a rough idea of moisture levels, they may miss early-stage ingress that a professional, multi-material meter would detect.
Where is damp most commonly found in a motorhome?
Water ingress usually begins at high-level breach points such as rooflights, solar panel cable glands, and aerial mounts. Because water follows gravity, it often travels down internal wall structures and pools in unventilated areas. You should pay particular attention to the back of overhead lockers, under-seat storage boxes, and the joints where the floor meets the side walls.
What is an acceptable moisture reading in a motorhome?
Readings between 0% and 15% are considered normal and indicate a dry vehicle. Due to the UK’s natural humidity, a 0% reading is actually quite rare. If your meter shows between 15% and 20%, you should monitor the area closely for changes. Anything consistently above 20% suggests active water ingress that requires professional investigation.
Does a DIY damp check count for my manufacturer warranty?
No, a DIY inspection is for your own peace of mind and personal monitoring only. Manufacturers strictly require a certified habitation report from an approved engineer to keep your water ingress warranty valid. Even if you know how to check for damp in a motorhome yourself, you must still book an official annual service to protect your legal and financial interests.
What should I do if I find a high moisture reading myself?
Confirm the reading first by checking for metal framing or wiring behind the wallboard, as these can trigger false positives. If the high reading is concentrated around a window, door, or roof seal, you should seek a professional fault diagnosis. Catching a leak at the 20% stage often allows for a simple reseal rather than a costly structural rebuild.
How often should I check my motorhome for damp?
A thorough DIY inspection should be performed every three months. Regular monitoring is especially important during the winter months when the vehicle is often in storage and seals are under pressure from frost and heavy rain. Understanding how to check for damp in a motorhome yourself between annual services is the best way to ensure a small leak doesn’t turn into a major problem.
Can condensation be mistaken for structural damp?
Yes, heavy surface condensation can saturate the outer layer of a wallboard and trigger high readings on a moisture meter. To tell the difference, wipe the area dry and improve ventilation before re-testing a few hours later. Structural damp is usually confined to a specific area near a seal, whilst condensation tends to be more widespread across cold external walls.
Is it worth buying a motorhome with a 25% damp reading?
A 25% reading indicates active water ingress and likely saturation of the internal structure. Whilst the vehicle might be repairable, you should never complete the purchase without a professional damp inspection and report to quantify the damage. The cost of stripping back wallboards and replacing rotted timber can easily run into thousands of pounds, so proceed with extreme caution.